Making your first pull request can be both an exciting and stressful endeavor. Your mind begins to flood with questions like “How can a newbie contribute to a project?”, “Where do I even begin?” and “What the heck is a pull request anyway?!?!” Fear not codenewbie! We’ll take you step by step through a real scenario using The Odin Project. Where we’ll fix a typo that any aspiring developer can tackle! Without further ado…
Prerequisite:
This tutorial assumes that you have git installed along with github set up. For those that don’t, you can refer to these two links to get you up and running:
Git - http://git-scm.com/book/en/v2/Getting-Started-Installing-Git
Github - https://help.github.com/articles/set-up-git/
Step 1: Finding the Typo
There are countless ways to begin contributing to open source projects. Whether it is adding a new feature to a framework or modifying a projects README file with typo fixes and documentation examples, there’s something for every level of a developer.
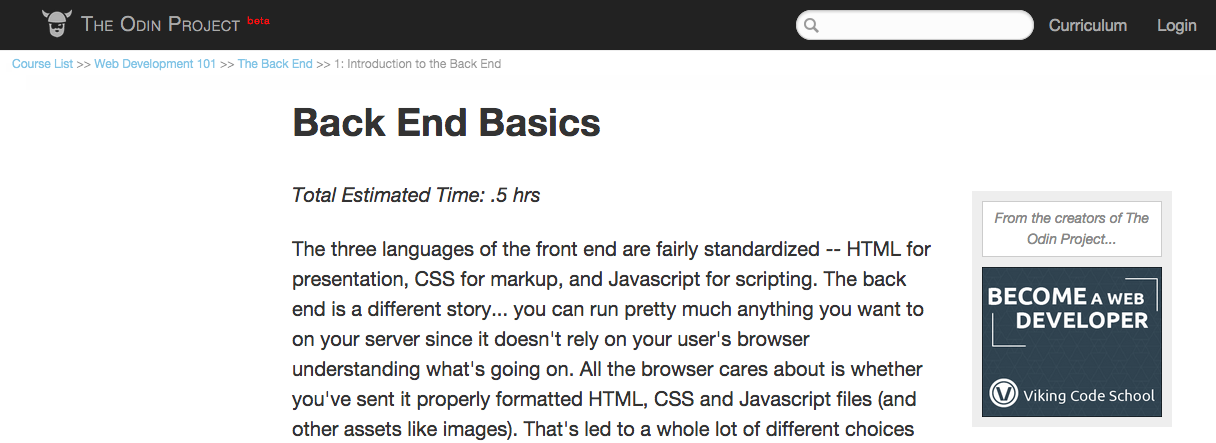
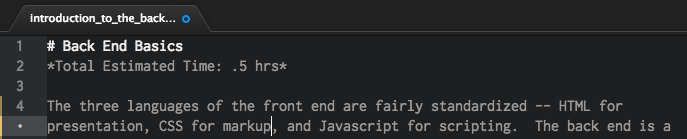
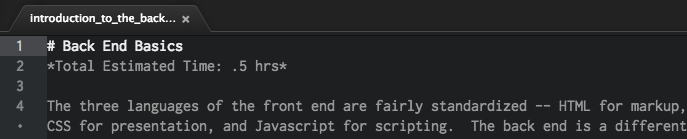
In this example I ran across a mixup of terms on The Odin Project, an open source curriculum for learning web development. They mistakenly mixed up the lines HTML for presentation, CSS for markup when it should instead be HTML for markup, CSS for presentation. Perfect time to help out!
Step 2: Locate the Repo on Github
To actually make that change, we need to find the Github repository (or repo) of The Odin Project. A repo is a place where a project lives. It allows you to keep copies of your projects on Github as well as allow collaboration between developers.
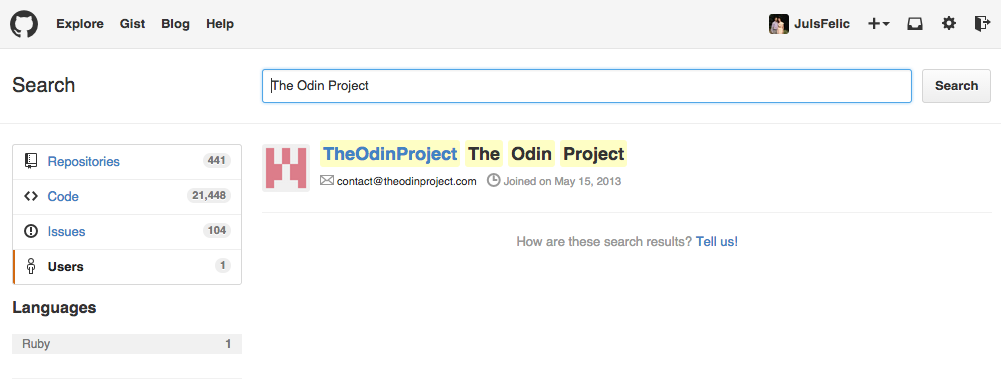
On the homepage of Github, we can type in The Odin Project in the search bar then click on the Users button and you will see a link to The Odin Project’s github page.
From there, go ahead and click on their curriculum and you’ll be brought to the repo. Sweet! Now what?

Step 3 : Hope You’re Hungry! It’s Time to Fork Down Some Repo’s!
So you think forks are just for food? Not anymore! When we fork a repo we are making a personal copy of the project into our github account. This allows us to make changes without directly affecting the main repo.
Forking is simple, just click on the button that says fork on the top right of the main repo and github will do all the heavy lifting for you!
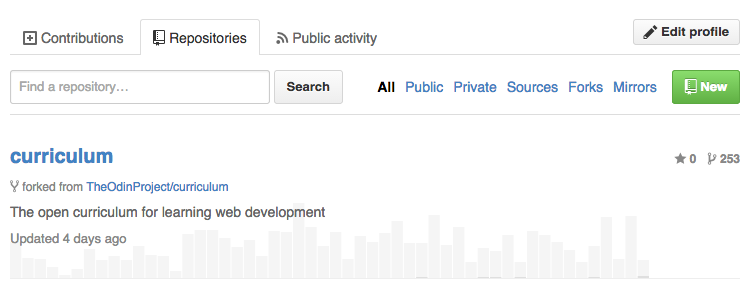
When all is complete, Github will lead us directly to our personal copy of the The Odin Project curriculum. You can also get to your repositories by going to your profile and clicking on the repositories tab.
Step 4 : Attack of the Clones!
At this point we have a copy of The Odin Project on Github, but still no copy on our local machine. Luckily there is a handy URL on the right side of the project that we can use to clone it! Cloning does exactly what it sounds like. It takes your Github repo and creates a clone of it on your computer. This allows you to make the necessary fixes, then push it back up to your Github repo. To clone the project, go ahead and copy the URL:

Then open up the command line and type git clone then the copied URL:

And voilà! Your own personal Storm Troop, uhh I mean repo!
Step 5: Now we get to fix that typo? `Bout time!
Ever so closer to the fruits of our labor, now it is time to fix the typo. The directory structure of The Odin Project is straightforward. The names of the directories are all sections within the curriculum. The typo we found was in the Web Development 101 section on a page called “Introduction to the Backend.” So we’re going to find the directory called “Web Development 101” and a file called “Introduction to the Backend” using our command line interface. On Mac or Linux, that’s our Terminal. In Windows, that’s our Git Bash or our Command Prompt. In our CLI, we are looking to change directories (cd) into web_development_101 and edit the file called introduction_to_the_back_end.md.
To help us navigate to the right place and find the file, we can use the command cd to change directories, and ls to list all the stuff that’s in that directory. If we ever get lost and don’t know where we are, we can type pwd to see the directory we are currently in.


Or if you’re not comfortable with using those commands in terminal, you can open the file by navigating in Finder(Mac), Nautilus(Linux), or Explorer(Windows).
Once your editor is open it is a quick fix and save.
Great! You’ve fixed the file! Now we need to get that change from our computer back up to Github so that everyone can see the fix.
Step 6: Saving your fix
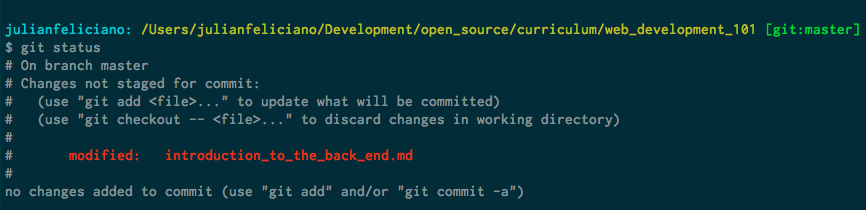
Go back to your CLI (command line interface) and type in git status. This command gives you a quick look into what branch you are on, what files have been modified, and what files are staged for a commit. In order to push our changes back up to Github, we must stage those changes, and then commit those changes. Currently, we see that introduction_to_the_back_end.md has been modified but those changes haven’t been staged.
To stage the commit we use the git add command and pass in the file that has been modified:

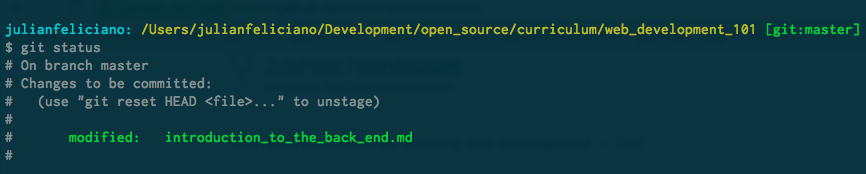
Just for a sanity check, we git status one more time. This time around, we can see that our changes have been staged, and our file is ready to be committed.
To make the change final, we’ll use the git commit command. Before we do that, let’s quickly discuss what a commit is.
Committing records changes in your repository. As you work on projects, committing allows you to save at different points during development. In case you royally mess up an important piece of code, instead of having to hit undo a bunch of times, you can “roll back” to a previous working commit.
Let’s go ahead and run the git commit command. Git requires a message with every commit. This is done with the -m flag (option) then a short description of the changes made.

The finish line is near! Just one more step!
Step 7 Pushing and Pulling `till the end.
The changes that we just made are all local to our machine. To get them up to our Github repo we need to push them up. This syncs up our github repo with our local repo and the change is now on Github.
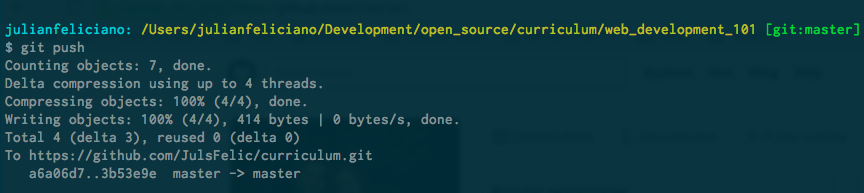
Head back to your curriculum Github repo, the one that we forked. Here is where we will submit our pull request. A pull request is how we submit our suggested edit to the project we have been working on. It allows the maintainer of the project to look over the edit, discuss any other changes that may need to be done and ultimately decide if they want to merge the change into the project. Whenever you are ready, go ahead and click on the green button.

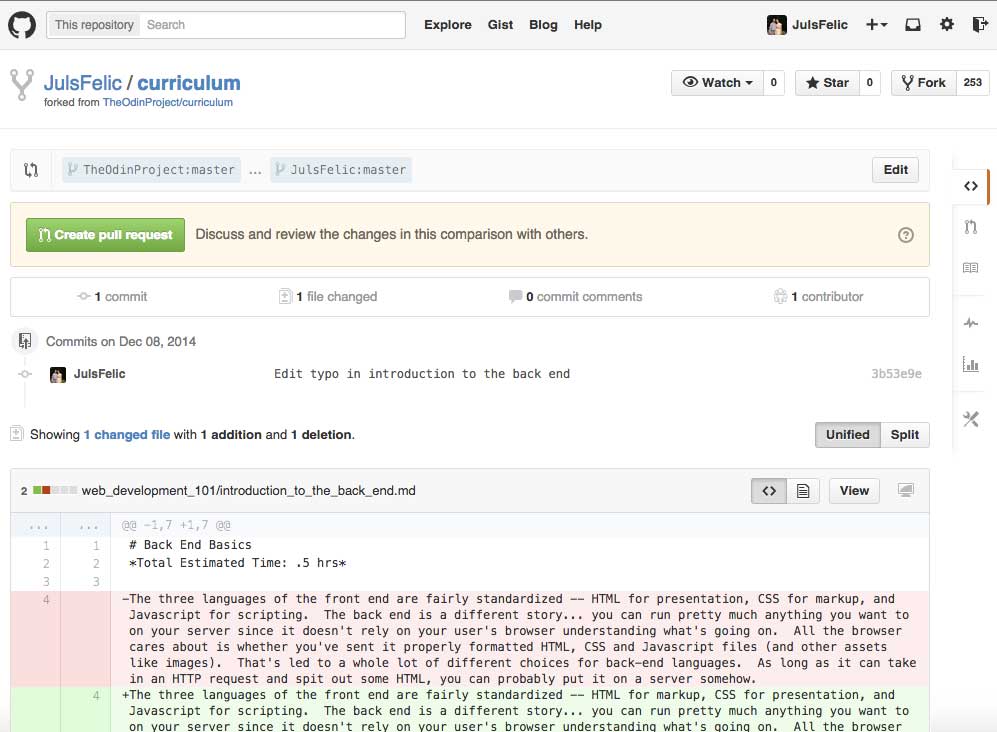
The page that shows up is an overview of the changes that you made. Double check to make sure everything looks good then go ahead and click create pull request.
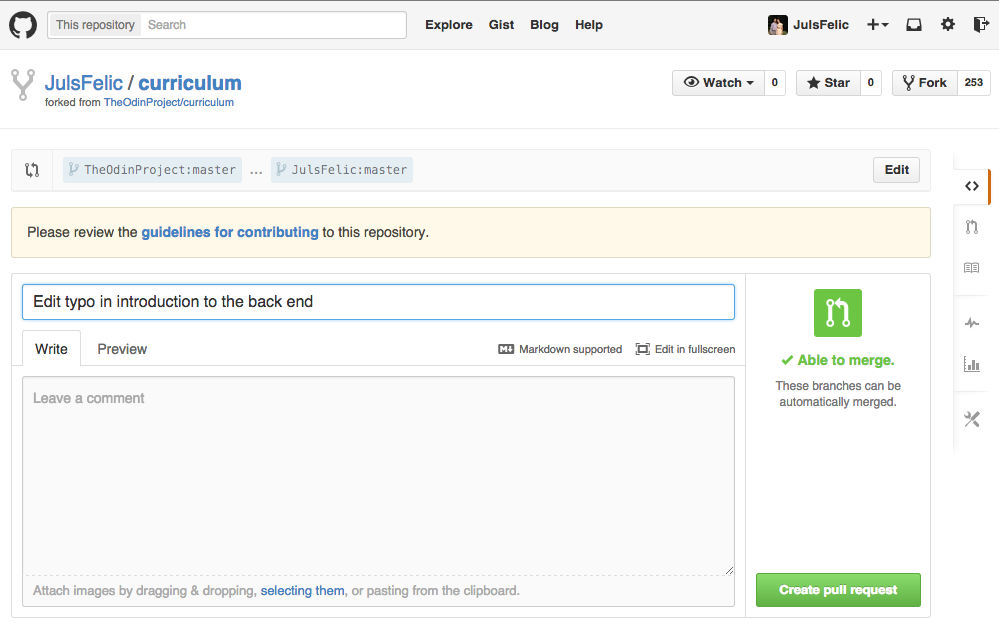
Just one final screen. You can write a short descriptive comment about the edit for the maintainer to see on this page. Take a deep breath, have a cup of water and click “create pull request” for the last time.
For most active projects on Github, you should expect some notification about your pull request within 1 - 3 days. Eventually, if everything pans out you will see a screen similar to this, telling you that you’re pull request has been merged, and your changes have been accepted:
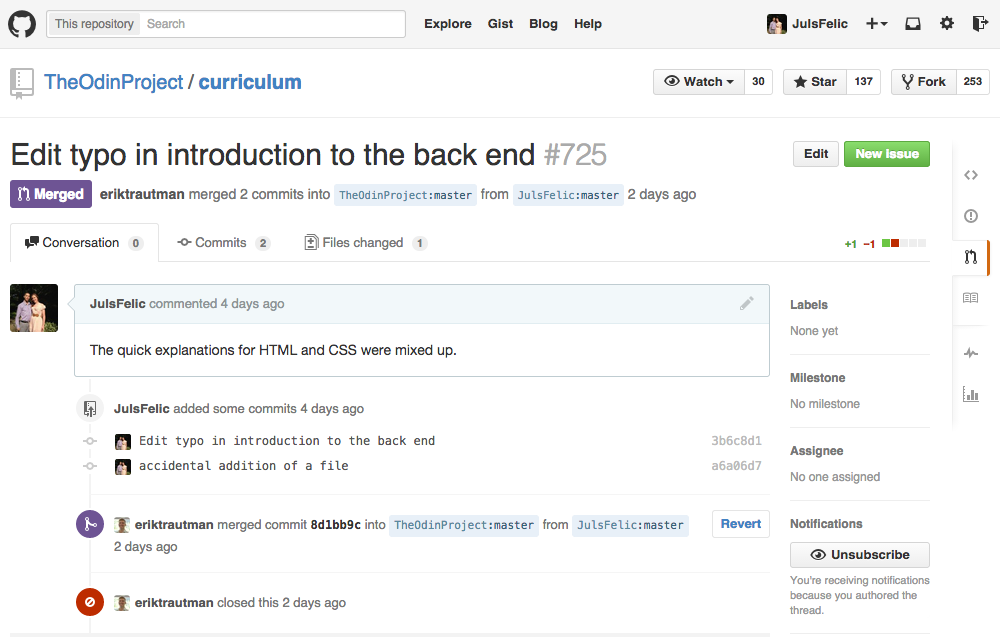
You did it! You made your first pull request! Go grab yourself an orange cream soda and celebrate!
Conclusion
Contributing to an open source project is a major milestone for a developer. But that doesn’t mean your contribution has to be large or intimidated. That typo fix we just did may not be a feature, but it probably cleared up a lot of confusion to code newbies reading that page. Many of the frameworks, libraries and tools we use everyday are open source. It is a great way to give back


